Antiquing Solutions for Shiny Metal
I began with several buckets from IKEA.
If you visit the blue links in this post you will be taken to other projects I've done with these products or the products themselves.
Some are affiliate links and Homeroad will earn a small stipend from your purchase at no additional cost to you.
The first one I painted with the Rust antiquing solution, here it is wet.
and here it is the next morning.
They recommend letting the finish cure overnight.
I liked the results.
The second one I painted with only the Patina Green and here it is wet.
Here it is the next morning.
I like it.
The third I painted with the Iron and the Patina Green here it is wet.
and here it is the next morning.
Notice the green patina that develops overnight.
Love!
And then I tried the Lysol.
I put one bucket inside the other with the Lysol in between.
I left it there for a couple of hours then rinsed it off.
and here it is the next morning.
This also turned out great!
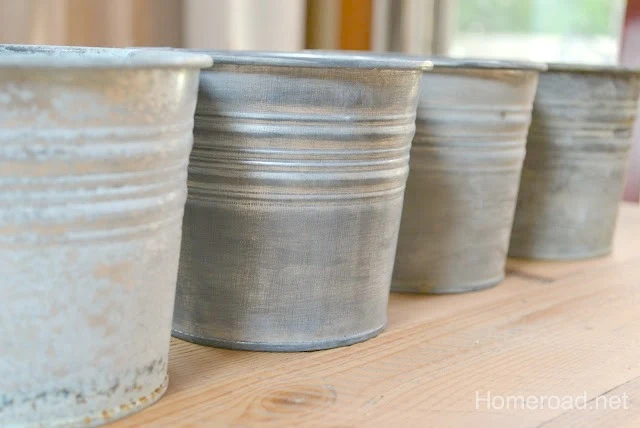
Now here they are all together.
From left to right they are...
Lysol, Rust, Patina Green and Iron with Patina Green.

While I like the Rust finish and I've used it on other projects like chicken wire.
You can also see it put to work when I aged a metal garbage can for the garden.
You can read all about those procedures by visiting the blue links.
My favorite is the Iron with the Patina Green on top.
I drilled a hole in each side of the can and added wire and a wooden handle.
Please note that the directions on the bottles may vary slightly from my experiments.
I have trouble with directions.
Some bottles tell you to use directly on the steel, others tell you to use it with another product like the Patina Green on top of the Iron.
These products can also be used on ceramics, wood, and other surfaces.
A sealer is recommended.
Use care when using these products for other than what they were made for.
READ MORE... DIY Antiquing Techniques.
Thanks so much for visiting and be sure to pin this project. You can follow Homeroad on Pinterest using the icons on the pop up and sign up for emails so I can send my latest DIY tutorial straight to you!


