How to Make a DIY Log Holder
This DIY log holder project is brought to you
today by my husband Jim and a couple of friends we've made along the way.
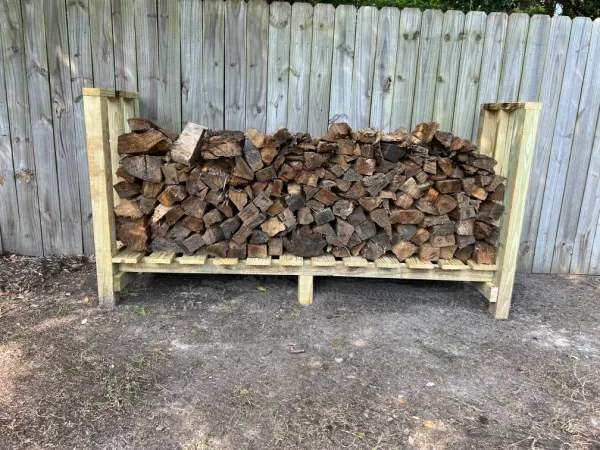
This DIY log holder is the perfect place to store the logs we need for our fire pit. We also use the logs on this rack for our indoor wood burning stove. Please read all the way to the bottom for the latest improvements to this design.
My husband had a picture of a log holder he wanted to make... so we were off to Home Depot.
To be honest the power tools in this family are mine... Jim does the cooking.
Two years ago we built a fire pit together (my most popular post ever) so this should be easy!
In the middle of Home Depot on Saturday morning we had major "discussions" on just how to proceed.
After asking a couple of the Home Depot experts we left there with the following:
We used pressure treated boards:
- three 8 foot 4x4's (including the improvements below)
- four 8 foot 2x4's
- two 10 foot 1x6's
- 3" decking screws
Being power saw newbies... we were going to get the 4x4's cut to 4' long each at at the store.
The 8 foot 2x4's were used for the sides and the now four foot 4x4 posts were used for the legs.
The third 8 foot 2x4 was cut and used as cross braces on each side.
The 1x6 pieces were cut into 2 foot boards to use as the flooring of the log rack.
They were spaced 3" apart.
The front yard is filled with cut logs we collected from the hurricane and once it is all split, it will stack nicely in the new log holder.
So now comes the fun part... get splitting Jim!
This was a fairly easy project so we finished it in one afternoon with little or no swearing... and we're still married.
*update... we received a lovely email from the Andersons in Pennsylvania letting us know that they built the log holder from these directions.
They were very happy with the ease and low cost of this design.
Below is a photo of the excellent job they did on their log holder.
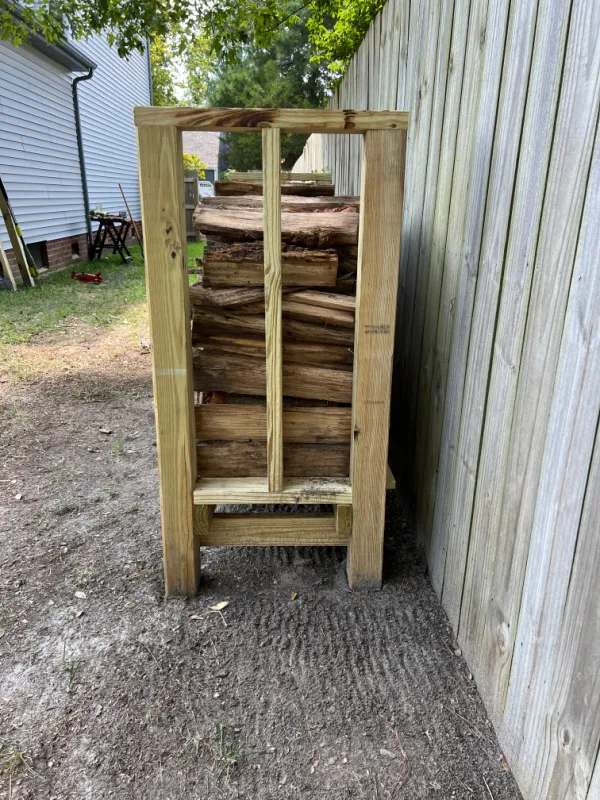
*Update #2: I am so thankful for my readers. I also have a new friend named Dante that not only built this log holder but made improvements that made it even better and stronger.
Dante suggested to put a 2x4" down each side to old in smaller logs and used 4x4" posts in the center to keep the middle from bowing over time if you have a heavy load. Below are the photos of Dante's improvements. I just love the input from our new friends!
Thank you Dante for your great improvements :)
Here's another great build using my directions and the improvements from my readers. This one was done by Gavin and Amanda in Pennsylvania:
"Thank you for answering my questions about the wood holder. I thought you would like to know that my husband and I built the wood holder with all the enhancements and we are very pleased with it. Thank you for the article and the how to on putting it together. We are new at building anything. Here is a picture of our new wood holder."
And now that we are complete experts at DIY building, we built a few other backyard essentials.
Please pin ---->>
Take a look at the backyard garden sink we built together.
Also be sure to visit the large outdoor coffee table we built.
And my personal favorite, the outdoor potting table!
Thanks so much for visiting and before you go please sign up for the Homeroad emails so I can send my latest DIY tutorial straight to you!


.png)
