Modern Farmhouse Kitchen Renovation
Now that I've lived through it, I'm going to show you our new kitchen. After living in our house for 27 years this amazing update was much needed...
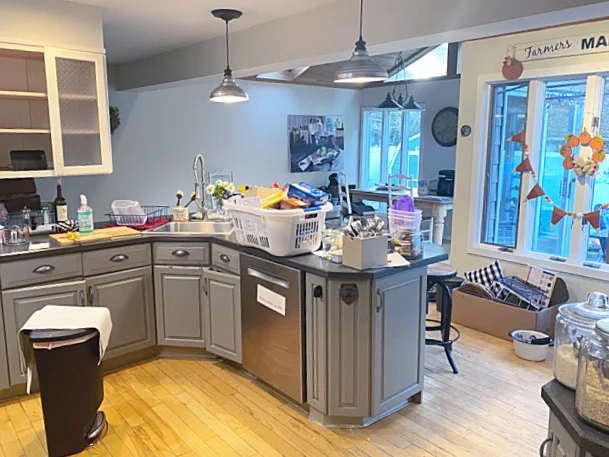
Here is the kitchen before.
My biggest problem was having to go around that peninsula every time I needed to get to the dining table.
My cabinets were chalk painted at one time a while back.
I am that person that changes the look of every room at least once a year.
If you're counting that's 27 times!
As you scroll through this post please pay attention to the bold blue links for more Homeroad information and the products I used for this project.
I refurnish furniture so I'm always selling what I made and replacing it with something new.
To be fair, styles have changed in 27 years too! That dark green cabbage rose wallpaper I thought looked good at one time was replaced with a yellow tuscan look and then finally several years ago, I decided on a light and bright neutral pallet.
My downstairs is a fairly open floor plan with a bump out (you can see at the far end of the photo below) that the previous owners had done.
The kitchen was not really attached to the dining room area so it was not used other than for a pass through and to house many pieces of furniture.
It was definitely time for a full renovation and my dreams of renovating the kitchen were about to come true.
Everything had to go! What was not sold got packed up and moved to the basement!
My son-in-law owns a contracting business so my life was in his hands, 3 or 4 weeks he told me...
Here is a video I made of the old kitchen.
Anyone who has ever had any work done knows that you really need to double that time frame, son-in-law or not. 🙄
The first thing they did, while we lived upstairs and made our microwave meals in the garage, was to demolish the existing kitchen.
Easy enough!
The hard part was that my entire downstairs had hard wood floors and we were sanding and refinishing all of them, some even needed to be replaced. Everything on the whole first floor had to be moved out.
We were also widening the doorways to create more of an open plan so there was a lot of work being done by a lot of people.
We chose our stain color, Provincial and moved over to our daughter's house while they finished the floors.
With the floors now covered, we moved back in and the electrical work was getting done.
We had LED high hats installed throughout the first floor.
During this time there were appliances and furniture to order, accessories to buy, and rugs to choose.
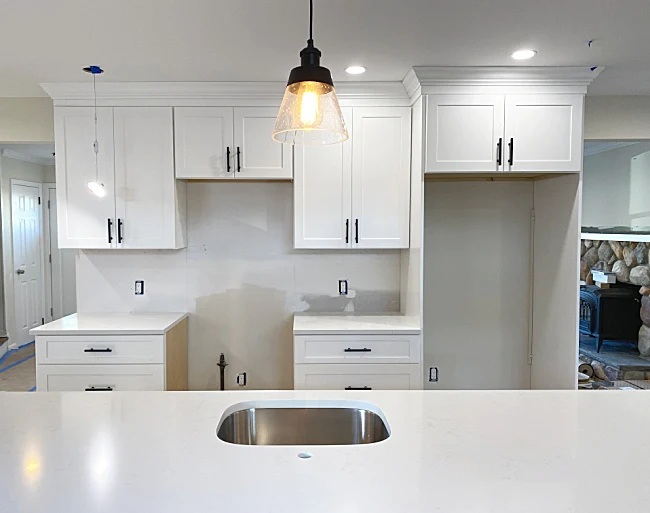
The cabinets finally arrived, they were installed by a local third party.
After a few delays, the cabinets were installed.
After a few little countertop mishaps, the kitchen was finally coming together!
This is going to be the coffee bar and pantry area.
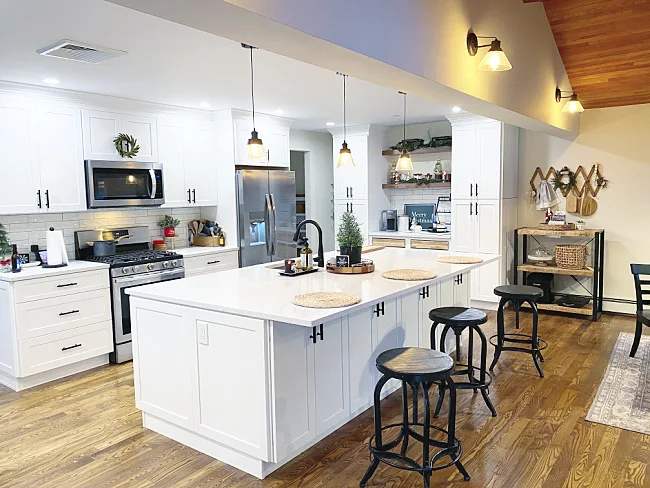
We had hanging pendants installed with bubble glass and matching sconces on the upper walls.
There is plenty of light in the space now!
The eating area is the extension that was added before we moved in, it's the perfect place for our dining table.
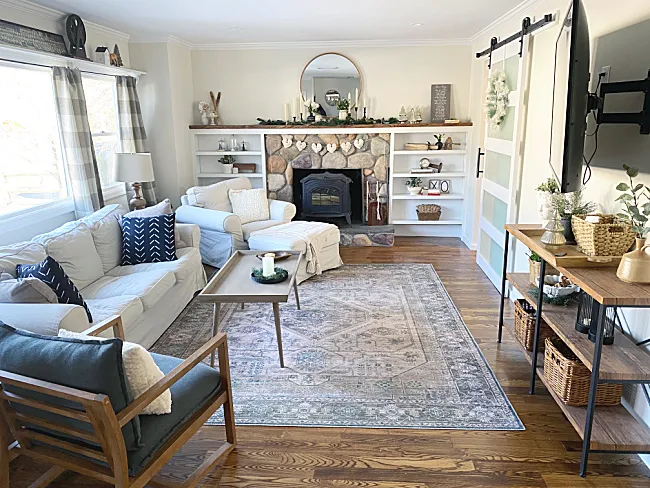
In the living room we added a barn door with frosted windows to let the light shine from both sides of the house.
The whole process took 8 weeks and while we are still waiting for a few drawer fronts, the kitchen (and first floor) I've always wanted is finally complete.
The family is over, I've got grandchildren on the counter and life goes on in a bigger and brighter space!
I am not going to lie, this was hard! If you are someone like me that likes to have all your ducks in a row... they won't be. For 8 long weeks my ducks were all over town!
I can relax now and my family and I can enjoy our home! If you're on Instagram you should be able to see the video of the whole tour at Christmas below!
Thanks for coming with me on a tour of our kitchen. I'll be happy to answer any questions below in the comments.
Before you go please sign up for the Homeroad emails so my next DIY tutorial will go straight to you!


