Two Sided Scrap Wood Christmas Sign
I'm at it again, making another Christmas sign. I'm pretty sure there is no wall space left in my house.
Today I'm creating a two sided sign... saving on wood and storage space! I can use one side for a while and flip it around, great for those who can't decide!
This was a fun one and I love the look!
Come see...
So first I grabbed the sign I made a couple of years ago, if you didn't see this one please check it out here. You won't be sorry, I love this one!
While you're reading through this post please visit the bold blue links for the products I used and links to related Homeroad projects. The READ NOW section will take you to bonus projects too!
Today I flipped the stained board around to use the back.
If you are starting from scratch, this is a 1x8" pine board with Transformations Decorative Glaze. I use this on everything as a stain and it washes up easily!
I gave the board a quick coat of black paint. I used Fusion Mineral Paint in Coal Black. On this sign I'm using my 3 favorite Fusion Mineral Paint colors!
I only painted the center of the board and dragged the paint toward the edges so the stain still shows.
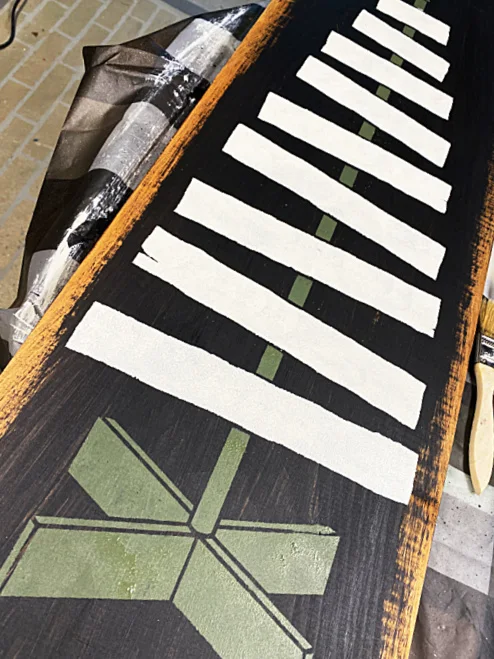
Next, using this adorable new stencil called Pallet Christmas Tree by Old Sign Stencils, I stenciled the areas I wanted to be green using Hazelwood.
When the green paint dried I went back and painted the scrap wood boards with Raw Silk.
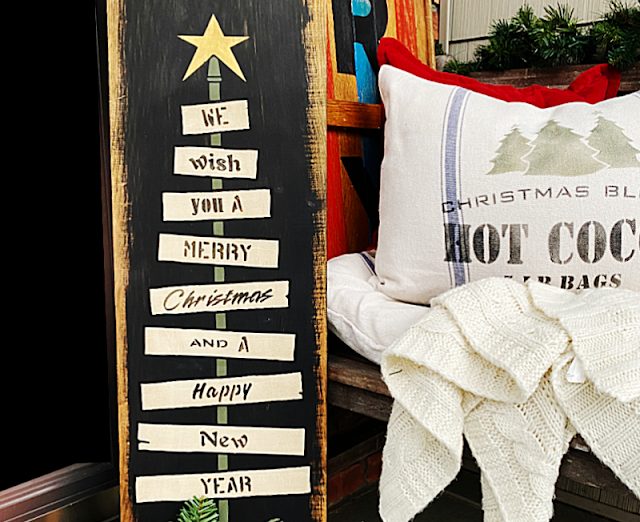
Then for the star I stenciled it with Rub and Buff Gold leaf. You may not be able to see it but it really shimmers! I swear I've used this stuff 100 times this season, it has the BEST gold finish!
Lastly, I added the stenciled words that are included on little stencils in this stencil kit.
When everything was finished the next morning I decided that the boards were too bright for the look I was going for so I grabbed the Transformations Glaze again and gave each white board a swipe of glaze. That is all it needed to tone down the color!
READ MORE: CHRISTMAS SIGNS
One more step was a spray matte sealer and now I believed my sign is finished. As an afterthought I wanted to add a basket at the bottom but I didn't want to attach it because remember... the sign has 2 sides.
Anyone in the mood for a gold brick stenciled basement floor can check it out in this post.
I ended up dropping the sign into the perfect size metal basket and it is removable. I may even try a low crate with pinecones too!
Please Pin -->>
I'm going to sit this on my porch and fill the basket with greens, berries and pinecones. If it ever stops raining that is!
The pillow and cushion makeover were another DIY tutorial you can find here.
READ MORE: DIY SIGNS
It is also a great sign to lean by the fireplace... so cozy!
This adorable stencil can be used in so many ways. Donna of Funky Junk Interiors used the stencil and added actual wooden slats on her sign to create a 3D effect. You're going to want to check that one out for sure!
Thanks so much for visiting with me today and before you go please sign up for the Homeroad emails so my next DIY tutorial will go out straight to you!


