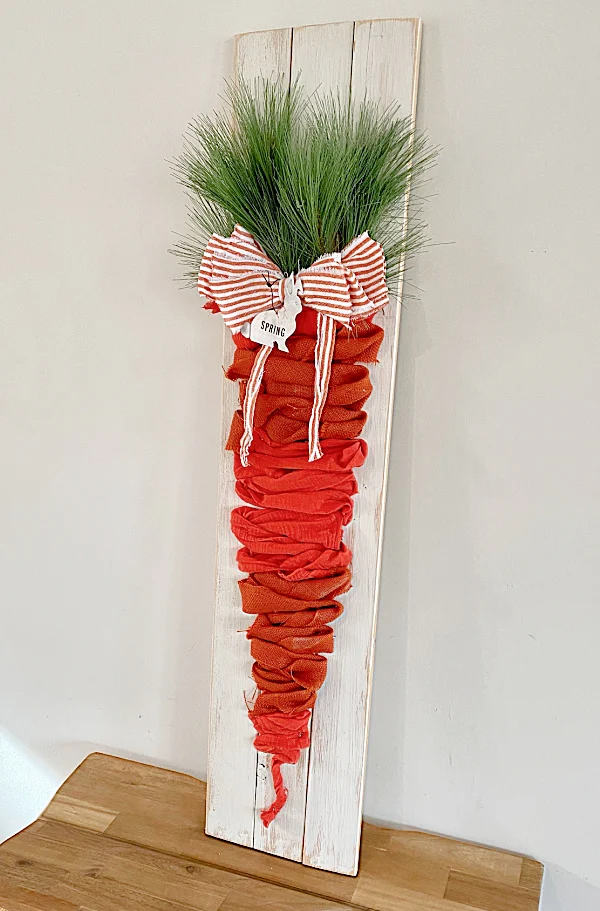
Large Recycled Fabric Spring Carrot
You've seen the adorable small fabric carrots out there but have you yet seen a huge one?
I like to do things big... and recycled... and free!
Today I'm creating a giant recycled fabric carrot for the front porch or fireplace that will really get your attention!
Take a look...
I began with 3 pieces of reclaimed wood from my garage. They were slats from an old bed that was thrown out. I always save the wood!
I glued the boards together using wood glue and tongue depressors.
While you're reading please visit the bold blue links for the products I used and links to related Homeroad projects. The READ NOW section will take you to bonus projects too!
The staples I'll be referring to in this post are "U" shaped tacks from this staple gun set I bought a while back. The "U" shaped staples were perfect for attaching the tongue depressors and the fabric for this project.
Once the boards were attached I used a circular saw to trim off the ends of the wood that were damaged.
Next, I gave the boards a quick uneven coat of Fusion Mineral Paint in Raw Silk. It is a great muted white color that isn't too bright.
While the paint was drying I grabbed orange fabrics from my fabric collection. Most of this fabric is from recycled clothing or scraps of other projects.
I tore the fabric into 4" strips and began stapling the fabric to the board in the shape of a carrot. I left room at the top for the carrot greenery.
I kept stapling and loosely twisting the orange fabrics, switching them out as I went, until I got to the bottom of the carrot then left a root tail at the bottom.
Next, I gathered the greenery I was going to use. You can use almost any kind of greenery, I'm using some leftover greenery from Christmas and I think it works. I tucked the greenery stems under the fabric at the top of the carrot and stapled it on securely.
Now it was time for the bow. I'm using the orange striped fabric from a recycled tea towel that I cut into strips and tied in the center. I added the bow with hot glue and more staples.
I added a bunny shaped tag with stick on lettering that says SPRING to the bow.
And finally I used the electric sander to go around the board to smooth any cut edges and splinters.
This carrot sign really screams Spring and Easter!
READ MORE: EASTER PROJECTS
Stick it on the front porch, by the fireplace, or anywhere you want to make a statement for Spring!
The best part is that it is adorable and didn't cost me a cent!!
Please pin -->>
Another idea is to leave off the bunny label and add the word "hop" at the top of the board. I printed out the word hop on the computer using the type font then scribbled on the back with pencil and traced over the letters so they came out onto the board. I then filled in the tracing with a black Sharpie paint pen. I love this idea!
READ MORE: CARROT PROJECTS
My new little assistant Sammy loves it too!
Thanks so much for visiting and before you go please sign up for the Homeroad emails so my next DIY tutorial will go out straight to you!


