Repurposed Frame Bunny Tray
I just got the cutest bunny napkins from my friend and neighbor Kim today and I couldn't wait to use them.
It's also the week before Easter so I better get busy making a project or the time to enjoy them for this year will be over.
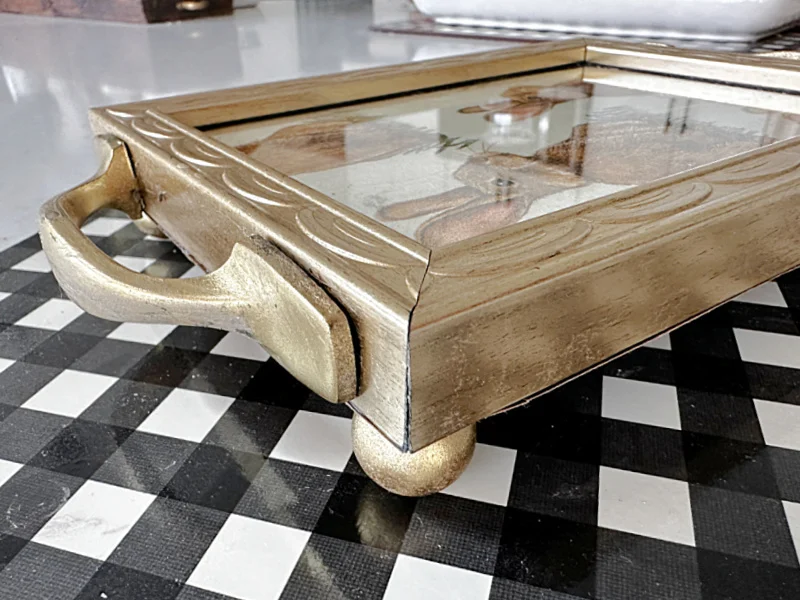
In just a couple of hours I had the cutest little golden bunny tray I'm going to use at my Easter buffet!
Take a look...
Now if you don't follow Kim from Exquisitely Unremarkable, you should! Her projects are adorable and easy to make! Did I mention that she is decorates a beautiful cottage style home? Did I also mention she lives a mile from me and has been such a help with the technical part of being a blogger? Go check her amazingness out for yourself!
Anyway, I commented on some cute bunny napkins she was using on a recent post and sure enough a few hours later, they appeared in my mailbox. It was a good trade on my part for a set of DIY vintage clothespin carrots.
And like I said I got to work on this project right away. I just happened to have a gold Dollar Tree frame on my desk and the back had broken off... bingo! This was going to the base of my project.
I began by peeling the layers off the napkin. I'm only going to use the single printed layer.
Next, I pulled apart the frame so all I had was the frame part. I'm using the cardboard insert from this frame for my project today.
I gave the cardboard a coat of off white wall paint (Benjamin Moore Ballet White to be exact) that I happened to be using to fix some scuffs on the wall today.
When the painted cardboard dried I used Fusion Mineral Paint's Decoupage Transfer Gel. You can also use Mod Podge.
While the Decoupage Gel was still wet I laid out the top layer of my napkin. I used a piece of plastic wrap to smooth out the napkin and get rid of any wrinkles. This technique works amazingly!
I let the bunny insert dry and got to work on the handles for my tray.
I had a bunch of handles leftover from my kitchen renovation so I painted a couple of them with my favorite, and hard to find, gold paint. It just so happened to match the frame perfectly!
While I waited for the handles to dry, I dropped the glass, the bunny cardboard and a styrofoam spacer into the frame. I closed up the back of the frame with a piece of brown paper card stock and hot glue.
Now it was time to attach the handles, I measured where I wanted them and drilled holes into the side of the frame. The frame was plastic so this was easy to do. I used E6000 glue to attach the handles into the holes on the side of the frame.
Next, I grabbed 4 wooden beads and inserted them on a skewer to paint with the same gold spray paint as the handles.
When the beads dried I attached them to the bottom of the tray with E6000 glue.
That's it! I'm finished with the bunny project in no time!
Please pin for later --->>
I love this little tray!
READ MORE: DIY TRAYS OF ALL KINDS
It will be great for small spoons, a candle, or even on a dresser for jewelry!
READ MORE: NAPKIN DECOUPAGE PROJECTS
What do you think Kim? I just love a challenge!


