Stenciled Farmhouse Pillow
Every once in a while I see a project out on the internet I want to recreate in my own way.
Today's farmhouse pillow project looked so easy I knew I could make mine very similar using items I had at home.
This pillow came from one of my favorite websites so I'll give you all the info if you'd just rather purchase your own!
Take a look...
I was in love with this pillow on the Antique Farmhouse website and if you're more of a buyer than a maker you might want to check it out. The price was right too!
When you click on the bold links you will be taken to the products I recommend for this project. If you order it does not change the price or service at all. As an affiliate associate I earn from qualifying purchases.
Also as you're reading please visit the bold blue links for the products I used and related Homeroad projects. Also the READ MORE section will take you to a variety of related DIY projects!
I began with a few simple supplies... a piece of old IKEA curtain fabric, my Cricut Joy machine and black paint.
I used my Cricut Joy Machine to print out the word FARMHOUSE in capital letters. I made it about 13" long.
There are other ways to add the word if you don't have a Cricut machine. You can also print out the word on the computer and use transfer paper to trace the word onto your fabric.
I printed out the vinyl word and removed the letters and cut the piece of fabric to the size of my pillow insert.
I attached the FARMHOUSE stencil to a piece of leftover IKEA curtain fabric but you could also use drop cloth fabric.
Using black craft paint, I stenciled very lightly into the lettering then pulled off the stencil.
The next step was the grain sack stripes.
There are a number of ways to make grain sack stripes but for this project I'm using the Grain Sack Stripe stencil from Old Sign Stencils.
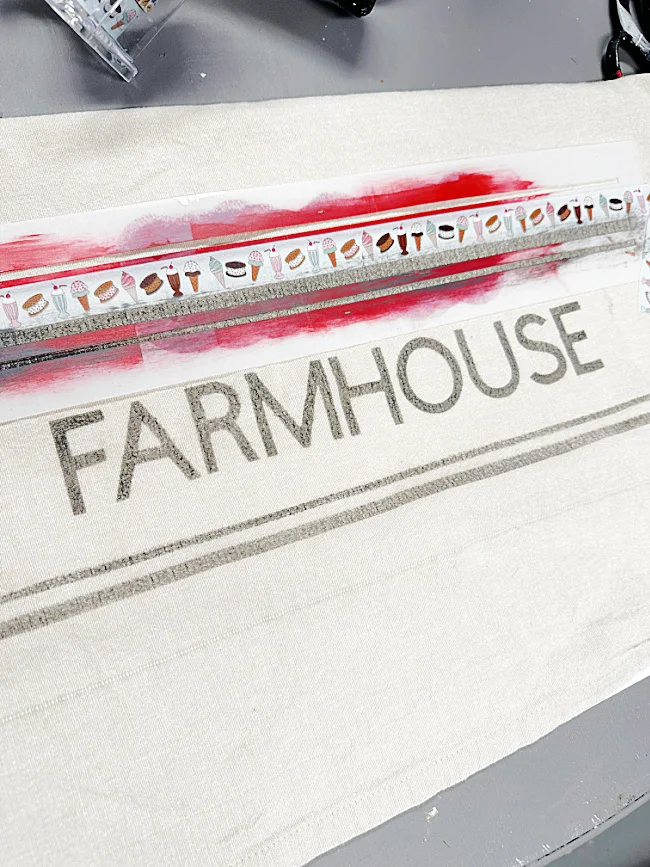
I wanted my lines to be a little thinner than this stencil so I used a strip of Washi Tape to make the lines thinner.
I used one very light coat of black paint again to stencil the stripes then flipped the grain sack stencil over and did the top of the word FARMHOUSE the same way.
I let the paint dry for about an hour.
Next, I wrapped the stenciled fabric around my pillow insert and cut off any extra fabric making sure to center the stenciled design.
Lastly, I am using the inexpensive small sewing machine I bought lately to stitch the pillow closed on all sides but one.
I inserted the pillow form then pinned the last end of the pillow closed and used a simple hand stitch to close the opening.
That's it!
Please pin for later --->>
I have a pillow that looks very similar to the one I loved on Antique Farmhouse!

Thanks so much for visiting and I hope you'll sign up for the Homeroad emails so you'll get my latest project tutorial and my weekend newsletter.


