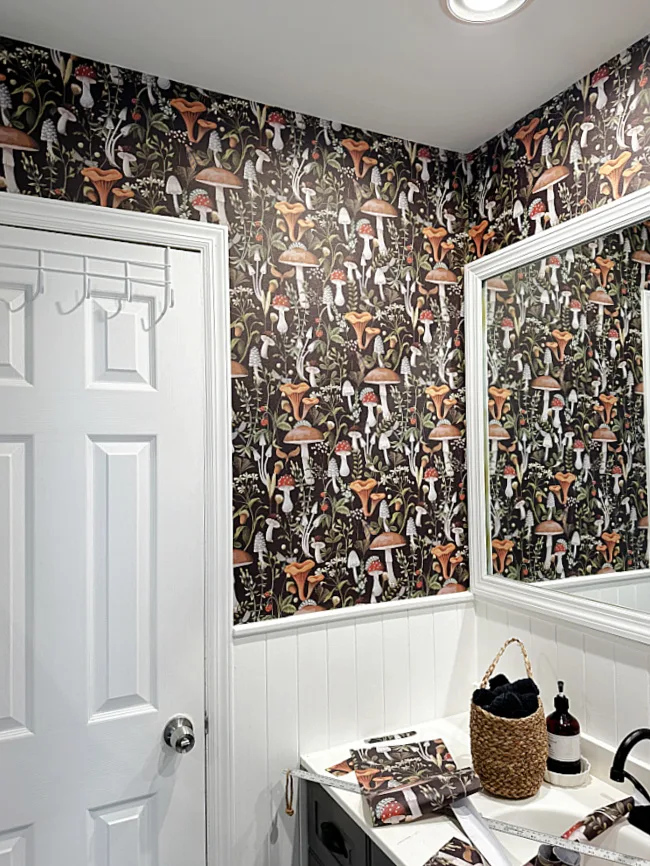
Mushroom Wallpaper Bathroom Makeover
This is not a sponsored post, it is just me redoing our guest bathroom one more time!
This bathroom has gone through a ton of changes and every one of them has a different look.
I've managed to save the old vanity a couple of times and today I'm using the CUTEST dark mushroom wallpaper to give the room some much needed character.
Have you ever used peel and stick wallpaper? Would you use dark wallpaper in a small bathroom?
Take a look...
Like I said, this bathroom has been through a whole bunch of updates in the past 30 years. Each project was just a little bit different.
When you click on the bold links you will be taken to the products I recommend for this project. If you order it does not change the price or service at all. As an affiliate associate I earn from qualifying purchases. Also as you're reading please visit the bold blue links for the products I used and related Homeroad projects. Also the READ MORE section will take you to a variety of related DIY projects!
If you can even believe it, the room used to be bright orange! I have no idea what I was thinking!

Here are some of the updates:
And if all of that wasn't enough, just recently I painted the vanity again. This time I used a gorgeous grey color called Hazelwood by Fusion Mineral Paint. I also used on all of my interior doors.
Today... I'm wallpapering! Here is the color of the wall "before":
I'm using this beautiful black mushroom designed peel and stick wallpaper I found on Amazon. It also comes in a light color as well!
I was inspired by a small bathroom I saw that was wallpapered with a black floral print and it really looked nice. I searched around for a dark peel and stick wallpaper and when I saw the mushrooms I was in love!
And so I began... The first thing I did was to choose a place to start. I began on one side of the room matching up the mushrooms with each panel I put up.
The wallpaper was a great quality and went up easily. I however, am not an expert and I had a few mistakes which you'll never find with this busy paper!
I went around just about two sides of the room then ran out of paper!
I ordered more paper and continued the papering a few days later.
The biggest question was how far around the room should I go? I knew I wanted to leave at least one side of the room the color it was, which matched the wallpaper perfectly! I decided to only do 2 walls because I thought going over the shower might close it in too much. What do you think? I might just wait and see how it looks.
I changed out the shower curtain I had to one that was all white like the wainscoting that goes half way up the wall.
I hung an old wooden shelf on the wall to hold bathroom items.
The long wall that I left painted has a large gold mirror thanks to the thrift store!
And that was it!
Please pin for later --->>

I used twice as much wallpaper as anticipated due to user errors and all the matching I had to do in small spaces with this busy pattern.
I used a white grout pen to brighten the grout in this bathroom and it worked great!
Please pin for later --->>
This pretty design was definitely a stretch from my usual neutral choices but I love it! It definitely gave this small bathroom some character!
Thanks so much for visiting and before you go please sign up for the Homeroad newsletter that goes out once a week with both old and new DIY projects!
So after discussing it with family members I decided to do the third wall over the shower.
Now the green painted wall is actually the accent!


